DISCLAIMER
Using this project in any test- or productive-environment is at your own discretion!
This project is still in heavy developement and large parts may change at any point in time.
Table of contents
1. Introduction
1.1 What is it?
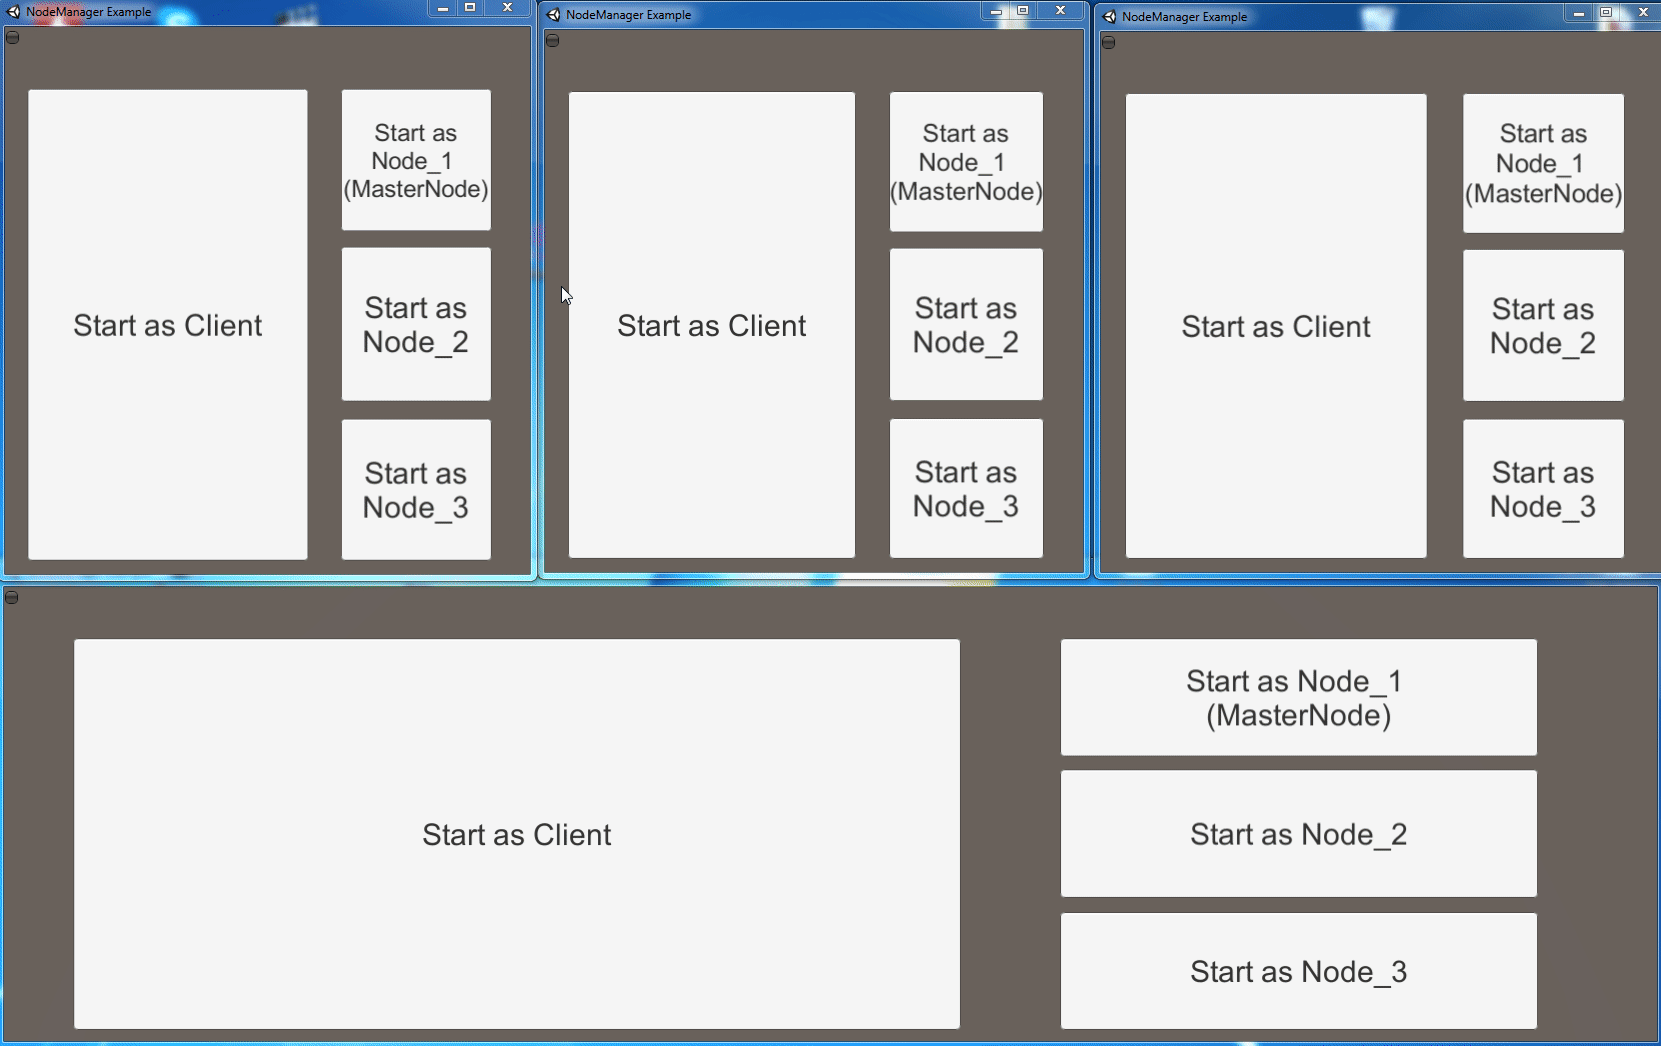
1.2 Demonstration
1.3 When to use it?
1.4 When not to use it?
1.5 Features
1.6 Installation and Setup
1.7 Overview of important classes, properties and functions
1.8 Overview (abstract)
2. How to …?
2.1 Create a NetworkScene
2.2 Create a NetworkScene on another Server
2.3 Create a NetworkBehavior in a NetworkScene
2.4 Create a NetworkBehavior in a NetworkScene on another Server
2.5 Transport the Player to another NetworkScene on any Server
3. The NodeManager
3.1 What does the NodeManager do?
3.2 NodeManager-Parameters
3.3 Server-To-Server Communication
3.4 NodeMaps
4. The NetworkSceneManager
4.1 What does the NetworkSceneManager do?
4.2 NetworkSceneManager-Parameters
4.3 NetworkBehaviorLists
5. Best Practices
5.1 Best Practice #1: Change parts you don’t like!
5.2 Best Practice #2: Prefix your Unity-Scenes!
5.3 Best Practice #3: Change to a better Serializer!
6. Unity Limitations
6.1 NavMeshes and SceneOffset
6.2 Static GameObjects and SceneOffset
7. FAQ
7.1 Which is the correct IsServer I should use?
7.2 My Scene is not being created or a wrong scene is created.
Introduction
What is it?
This project is an alternative implementation of the standard NetworkManager that comes out-of-the-box with Forge Networking Remastered as an attempt to provide functionality like a persistent world, dungeon instancing or the concept or ‘rooms’ in one or more servers.
Demonstration
When to use it?
- You need your game to be split up into smaller parts and/or want to be able to run one game on multiple servers.
- You need “Room”-functionality.
- You want your clients to only connect to and see one part of the world instead of everything.
- You want functionality like a persistent world or dungeon instances.
When not to use it?
- If you have no prior experience with Networking or Forge Networking Remastered. Gain experience with the framework first.
- If your project is an arena- or lobby-style game stick with the default
NetworkManager.
Additionally, at the time of writing the native Steam-Integration of the standard NetworkManager, the standard implementation of a MasterServer, compatability with the Webserver or Matchmaking in Forge Networking Remastered are not integrated. While these features might be implemented at a later time please know that you will need to provide them yourself currently.
Be aware that if you want to use this over the standard NetworkManager or not depends on the scope and features of your own project and is at your own discretion.
Features
Info: the term “NetworkScene” describes a Unity-Scene with a NetworkManager that is only handling the NetworkBehaviors in that Unity-Scene.
- A Scene-based
NetworkManagerfor easy creation ofNetworkScenes - Multiple
NetworkScenesper Server-Instance - Multiple Server-Instances (Can run the first 5
NetworkScenesof your game on “Server_1” and another 3NetworkSceneson “Server_2”) - Provides extendable interconnection between Server-Instances out-of-the-box without a database
- Supports creating
NetworkScenesfrom one Server in another Server - Supports instantiating
NetworkBehaviorsfrom one Server in another Server - Clients can be instructed to change
NetworkScenesby the Server - Concept of “Static-Scenes”:
NetworkScenesthat are and should always be reachable under a certain IP and Port, basically the “static world”/“overworld” - Concept of “Dynamic-Scenes”:
NetworkScenesthat are created on demand for things like Dungeon Instances or Player Housing Instances etc. and that will be destroyed again at some point - Port-recycling for “Dynamic Scenes”: If a “Dynamic Scene” is destroyed the port can be reused at a later time from a range of allowed Ports
- A global registration system for “Dynamic Scenes” that all servers can lookup connection information in and for preventing name-collision of
NetworkScenesacross Server-Instances - Creating
NetworkSceneswith a position-offset to prevent them physically overlapping each other NetworkScenescan try to reconnect/rebind after a set delay when disconnected
Installation and Setup
I recommend at least Unity 2018.3.6f1. If you have issues try upgrading to this or a higher version of Unity.
-
Create a new and empty Unity-Project.
-
Import the latest version of the “Forge Networking Remastered”-unitypackage into the empty Unity-Project from the official GitHub-Page found here: https://github.com/BeardedManStudios/ForgeNetworkingRemastered
-
Download the
ForgeAndUnity.unitypackagefrom here: https://github.com/k77torpedo/ForgeAndUnity/tree/master/UnityPackages -
Import the
ForgeAndUnity.unitypackageinto the project. -
Register the Unity-Scenes found in the MultiServer-Example-Project in the BuildSettings and in the order shown below:

- You need to recompile the
NetworkBehaviorsin Forge Networking Remastered in order for theNetworkBehaviorsto work. To do so you simply need to save anyNetworkBehaviorin the Network Contract Wizard as shown below:

-
Open the
Login-scene in the Unity-Editor. -
Press Start!
Overview of important classes, properties and functions
Click on the images below to enlarge.

Overview (abstract)

How to …?
Create a NetworkScene
Every NetworkScene is created from a NetworkSceneTemplate. Creating a NetworkSceneTemplate during runtime is very easy and straight-forward as shown below:
// Create the connection-information for the NetworkSceneTemplate
NetworkSceneManagerSetting setting = new NetworkSceneManagerSetting();
setting.MaxConnections = 64;
setting.UseTCP = false;
setting.UseMainThreadManagerForRPCs = true;
setting.ServerAddress = new NetworkSceneManagerEndpoint("127.0.0.1", 15000);
setting.ClientAddress = new NetworkSceneManagerEndpoint("127.0.0.1", 15000);
// Create the NetworkSceneTemplate with our connection-information
NetworkSceneTemplate template = new NetworkSceneTemplate();
template.BuildIndex = 1;
template.SceneName = "My_Custom_NetworkScene_Name";
template.Settings = setting;
//Create the NetworkScene
NodeManager.Instance.CreateNetworkScene(template);
First you set up the connection-information. Then you set the BuildIndex of the scene you want to create as a NetworkScene. Finally, you choose a custom-name for your NetworkScene. The NodeManager will do the rest for you.
You can have 500 NetworkScenes of the same BuildIndex as long as they all have unique custom-names - this is especially important when creating dungeon-instances where you want to create the same dungeon over and over for different players. To take it even one step further you can hook up to events that will be emitted during scene-creation. This lets you know when exactly your scene is ready to instantiate your NetworkBehaviors:
//Create the NetworkScene
NetworkSceneItem scene = NodeManager.Instance.CreateNetworkScene(template);
if (!scene.IsReady) {
    scene.OnReady += (pItem) => {
        Debug.Log("Your NetworkScene is ready!!!");
    };
}
Create a NetworkScene on another Server
Creating a NetworkScene on another server is pretty easy and very similar to creating it locally as shown below:
// Create the connection-information for the NetworkSceneTemplate
NetworkSceneManagerSetting setting = new NetworkSceneManagerSetting();
setting.MaxConnections = 64;
setting.UseTCP = false;
setting.UseMainThreadManagerForRPCs = true;
setting.ServerAddress = new NetworkSceneManagerEndpoint("127.0.0.1", 15000);
setting.ClientAddress = new NetworkSceneManagerEndpoint("127.0.0.1", 15000);
// Create the NetworkSceneTemplate with our connection-information
NetworkSceneTemplate template = new NetworkSceneTemplate();
template.BuildIndex = 1;
template.SceneName = "My_Custom_NetworkScene_Name";
template.Settings = setting;
//Create the NetworkScene on another Node
uint targetNodeId = 2;
NodeManager.Instance.CreateNetworkSceneInNode(targetNodeId, template);
You will need to know the NodeId of the server you want to create the NetworkScene in. You can set each NodeId on the NodeMap (see 3.4 NodeMaps for more information). Also be aware that you need to have at least one NodeManager running as a MasterNode as otherwise no Server-To-Server communication can happen. You can set a Node as IsMasterNode in the NodeMap of the NodeManager.
As with locally creating a NetworkScene we also have the option to hook up on events to know if anything went wrong or the scene has been created successfully:
//Create the NetworkScene on another Node
uint targetNodeId = 2;
ServiceCallback callback = NodeManager.Instance.CreateNetworkSceneInNode(targetNodeId, template);
if (callback.State == ServiceCallbackStateEnum.AWAITING_RESPONSE) {
    callback.OnResponse += (pResponseTime, pResponseData, pSender) => {
        if (pSender.State == ServiceCallbackStateEnum.RESPONSE_SUCCESS) {
            Debug.Log("Your NetworkScene is ready!!!");
        }
    };
}
Altough it involves a bit more code we can still check for success!
Create a NetworkBehavior in a NetworkScene
You can instantiate new NetworkBehaviors as shown below:
// Instantiate a new NetworkBehavior in the current NetworkScene
string currentSceneName = gameObject.scene.name;
int playerCreateCode = 1;
NetworkBehavior behavior = NodeManager.Instance.InstantiateInScene(currentSceneName, playerCreateCode);
If you prefer readability you can also instantiate via name:
// Instantiate a new NetworkBehavior in the current NetworkScene
string currentSceneName = gameObject.scene.name;
NetworkBehavior behavior = NodeManager.Instance.InstantiateInScene(currentSceneName, "Player");
You can setup the names for each NetworkBehavior in the NetworkBehaviorList of the NodeManager (see 4.3 NetworkBehaviorLists for more information).
Create a NetworkBehavior in a NetworkScene on another Server
Instantiating a new NetworkBehavior on another server is very similar to instantiating it locally as shown below:
// Instantiate a new NetworkBehavior in a NetworkScene on another Node
uint targetNodeId = 2;
string sceneName = "NetworkSceneName_On_Node2";
int monsterCreateCode = 2;
NodeManager.Instance.InstantiateInNode(targetNodeId, sceneName, monsterCreateCode);
As we sometimes need to make sure that something is successfully instantiated on another server we have the option to hook up on events to get notified on success or failure:
// Instantiate a new NetworkBehavior in a NetworkScene on another Node
uint targetNodeId = 2;
string sceneName = "NetworkSceneName_On_Node2";
int monsterCreateCode = 2;
ServiceCallback callback = NodeManager.Instance.InstantiateInNode(targetNodeId, sceneName, monsterCreateCode);
if (callback.State == ServiceCallbackStateEnum.AWAITING_RESPONSE) {
    callback.OnResponse += (pResponseTime, pResponseData, pSender) => {
        if (pSender.State == ServiceCallbackStateEnum.RESPONSE_SUCCESS) {
            Debug.Log("Your NetworkBehavior has successfully been instantiated!!!");
        }
    };
}
Transport the Player to another NetworkScene on any Server
Transferring a player to another NetworkScene has many obstacles we need to overcome. Timouts, errors, what if the NetworkScene is not there anymore? The NetworkSceneTeleporter is a prefab that already handles these things out-of-the box and gives you a starting point to implement your own logic if you want to.
Please see the NetworkSceneTeleporter-Prefab and NetworkSceneTeleporter-Script that are included in this project for more information.
The NodeManager
What does the NodeManager do?
The NodeManager helps you with the following tasks:
- Create and remove
NetworkSceneswithout name-collision - Redirect instantiation of
NetworkBehaviorsto the correctNetworkSceneManagers - Establish and maintain Server-To-Server communication
The NodeManager is the central point for creating, removing and looking up NetworkScenes. It supports you with several helper-functions like FindNetworkSceneItem() or FindNetworkSceneTemplate() to make handling all your scenes easier. It exposes a variety of events for you within NetworkScene-creation and NetworkBehavior-instantiaton.
You can start the NodeManager as a server or a client through its respective StartAsServer()- or StartAsClient()-functions.
NodeManager-Parameters

- NetworkSceneManagerPrefab: The
NetworkSceneManageron this Prefab will be instantiated for allNetworkScenesto handle networking. Use this to provide a customNetworkSceneManagerif needed. - AutoReconnectMasterManager: When enabled the
NodeManagerwill try to reconnect if it has lost its connection to theMasterNodein order to maintain Server-To-Server communication. If you only have oneNoderunning as a server you should disable this. - AutoReconnectMasterManagerInterval: The interval in seconds to which the
NodeManagershould try to reconnect to theMasterNode. - EnableRegisterDynamicScenes: When enabled the
NodeManagerwill register its dynamic scenes to theMasterNodeso otherNodeManagerscan look up itsNetworkScenes. If you only have oneNoderunning as a server you should disable this. - RegisterDynamicScenesRequireConfirmation: When enabled a
NetworkScenecan only be fully initialized if itsNetworkScenehas been successfully registered on theMasterNodeelse it will be deleted. RegisteringNetworkSceneson theMasterNodeis done to prevent scene-name-collision across servers. If you only have oneNoderunning as a server you should disable this. - EnableSceneLookUpCaching: When enabled all lookups of
NetworkScenesfor connection-data from other servers through theMasterNodewill be cached to prevent unnecessary querying of theMasterNode. - NodeMapSO: When starting as a server the
NodeManagerwill lookup theNodeit should start as and initialize allNetworkSceneTemplatesfor thatNodeas staticNetworkScenes. - ServiceNetworkBehaviorListSO: All
NetworkBehaviorsin thisNetworkBehaviorListwill be initialized by theMasterNodeto act as services for Server-To-Server communication. The only service is currently theNodeServicewhich provides functionality to createNetworkScenesandNetworkBehaviorson other servers. - NetworkSceneBehaviorListSO: A list of all
NetworkBehaviorsthat can be instantiated by anyNetworkSceneManagerfor its respectiveNetworkScene.
Server-To-Server Communication
 In order for
 NetworkBehaviors and especially Players to move across server-instances we need Server-To-Server communication so that if a Player in ‘Server A’ moves to ‘Server B’ the data of the Player can be properly transmitted.
How do servers communicate with each other you might ask? The answer to that would be very simple: all servers play their own little Forge-Game to transmit information with each other where one server is the host (the MasterNode) and the other servers are the clients. The NetworkSceneManager for this game is located on NodeManager.MasterManager.
Additionally, if you look at the NodeService-Script that is currently used for Server-To-Server communication you will find that it is just a simple NetworkBehavior instantiated like any other on the game that the servers are playing with each other.
This gives you all the flexibility of Forge Networking Remastered to extend Server-To-Server communication without introducing extra logic or restrictions. If you want the servers to communicate more information or add stuff like database-functionality across servers you can just make a NetworkBehavior and instantiate it on the game the servers are playing with each other - easy as that!
NodeMaps
NodeMaps describe all Nodes with their respective NetworkScenes that a NodeManager should instantiate. Theese NetworkScenes are guaranteed to always be reachable under a certain Ip or Port and thus form your ‘persistent world’ or ‘overworld’ - they are refered to as static NetworkScenes. Every NodeManager needs a NodeMap to start. You can create a NodeMap by right-clicking in your project-window and choosing ‘Create > ForgeAndUnity > NodeMapSO’ as shown below:

This will create a Scriptable-Object holding your NodeMap that you can edit and assign to the NodeManager.
The NetworkSceneManager
What does the NetworkSceneManager do?
A NetworkSceneManageris always responsible for exactly one Unity-Scene. The NetworkSceneManager instantiates NetworkBehaviors and makes sure they are moved to its Unity-Scene. This way the world can be easily split up into many parts which each part being a Unity-Scene handled by a NetworkSceneManager. A Unity-Scene and a NetworkSceneManager together are refered to as a NetworkScene.
The client will only ever be connected to one NetworkSceneManager and only see the part of the world the NetworkSceneManager is handling.
NetworkSceneManager-Parameters

- NetworkBehaviorListSO: A list of all
NetworkBehaviorstheNetworkSceneManagercan instantiate. If theNetworkSceneManagerhas been created by aNodeManagerit will use theNetworkBehaviorListSOof theNodeManager. - AutoReconnect: When enabled the
NetworkSceneManagerwill try to reconnect if connection has been lost. - AutoReconnectInterval: The interval in seconds the
NetworkSceneManagershould try to reconnect.
NetworkBehaviorLists
NetworkBehaviorLists are lists of NetworkBehaviors that a NetworkSceneManager can instantiate over the network. You can create a NetworkBehaviorList by right-clicking in your project-window and choosing ‘Create > ForgeAndUnity > NetworkBehaviorListSO’ as shown below:

This will create a Scriptable-Object holding your NetworkBehaviorList that you can edit and assign to your NetworkSceneManager and NodeManager.
Best Practices
Best Practice #1: Change parts you don’t like!
You can change and extend most of the code from the project without touching the core-files. Nearly everything in the NodeManager and NetworkSceneManager for example is marked as virtual and you are encouraged to derive from these classes and override them or extend parts and functions according to your project. Even the Prefabs that come with the project like the NetworkSceneTeleporter have all their functions marked as virtual so you can quickly extend them.
Also note that the NodeManager has a public parameter for providing your own NetworkSceneManager-Prefab that it should instantiate for all NetworkScenes which makes it even more easy to provide your custom-logic.
TL;DR: You can and should derive from all classes. You are encouraged to change bits and parts depending on the needs of your game!
Best Practice #2: Prefix your Unity-Scenes!
At any time and especially during scene-creation all Unity-Scenes must be named unique. Please prefix your Unity-Scene-Files so name-collision can be avoided. Instead of ‘Level_1’ use ‘template_Level_1’ or ‘t_Level_1’ as this ensures there are no name-collisions during scene-creation that may cause unexpected behavior.
Explanation:
To create a new NetworkScene the framework will first create an empty Unity-Scene with your desired scene-name (here ‘Level_1’) and put a NetworkSceneManager in it so it can be connected to.
Then a second - the actual - scene will be created with the BuildIndex provided from the Unity-Scene-File. This scene is to be merged with the other scene we created previously. The new scene will also be named ‘Level_1’ - in accordance to the Unity-Scene-File-Name. Now we have a name-collision. We have 2 Scenes with the name ‘Level_1’ that can’t be merged because they both have the same name.
Best Practice #3: Change to a better Serializer!
Info: This is more reserved for the end of your project so don’t overstress it.
All internal serialization of data is currently done via C#s BitFormatter which is very flexible and undemanding in what it can serialize and deserialize but an atrocity in efficiency and performance. I just want to mention that you might want to switch to a different serializer at some point in time like MsgPack, Ceras or ZeroFormatter.
Unity Limitations
NavMeshes and SceneOffset
Info: The NetworkSceneTemplate.SceneOffset allows a NetworkScene to be created with an offset so that it does not physically overlap with existing scenes.
Be aware that when you create a dynamic scene like a new dungeon instance or a player housing instance that the NetworkSceneTemplate.SceneOffset will not move the NavMesh associated with the scene. I recommend using the NavMeshTools from Unity to be able to create NavMeshes during runtime solve this problem.
Static GameObjects and SceneOffset
Info: The NetworkSceneTemplate.SceneOffset allows a NetworkScene to be created with an offset so that it does not physically overlap with existing scenes.
Be aware that when you create a dynamic scene like a new dungeon instance or a player housing instance that the NetworkSceneTemplate.SceneOffset can’t be properly applied to the Unity-Scene when the GameObjects of the Unity-Scene are marked as static.
FAQ
Which is the correct IsServer I should use?
To check if you are the server or the client you can either globally check for NodeManager.IsServer or locally check for networkObject.IsServer in your NetworkBehaviors from Forge Networking Remastered.
Do not use NodeManager.MasterManager.IsServer as this is an indication if a Node is connected to a MasterNode as a client or host within Server-To-Server communication. Also do not use NetworkManager.IsServer as that is the default NetworkManager of Forge Networking Remastered we are not using.
My Scene is not being created or a wrong scene is created.
Make sure that all Unity-Scenes you want to create as a NetworkScene are added in your Build-Settings. A Scene that is not added to your Build-Settings can’t be created during runtime.
Also make sure you have the correct BuildIndex when creating your NetworkScene.
Todo (Please bare with me 😃 )
- What are services? How to make a service?
- How are the Nodes communicating with each other?
- Cleaner terminology througout documentation
- Better use of markup, what a mess lol
More to come 😃
MIT License
Copyright © 2018 k77torpedo
Permission is hereby granted, free of charge, to any person obtaining a copy of this software and associated documentation files (the “Software”), to deal in the Software without restriction, including without limitation the rights to use, copy, modify, merge, publish, distribute, sublicense, and/or sell copies of the Software, and to permit persons to whom the Software is furnished to do so, subject to the following conditions:
The above copyright notice and this permission notice shall be included in all copies or substantial portions of the Software.
THE SOFTWARE IS PROVIDED “AS IS”, WITHOUT WARRANTY OF ANY KIND, EXPRESS OR IMPLIED, INCLUDING BUT NOT LIMITED TO THE WARRANTIES OF MERCHANTABILITY, FITNESS FOR A PARTICULAR PURPOSE AND NONINFRINGEMENT. IN NO EVENT SHALL THE AUTHORS OR COPYRIGHT HOLDERS BE LIABLE FOR ANY CLAIM, DAMAGES OR OTHER LIABILITY, WHETHER IN AN ACTION OF CONTRACT, TORT OR OTHERWISE, ARISING FROM, OUT OF OR IN CONNECTION WITH THE SOFTWARE OR THE USE OR OTHER DEALINGS IN THE SOFTWARE.